How to: C4 Corvette Brake Rotors and Pads
When I recently bought a used (but not abused) ’94 Corvette, one of the bargaining points on the deal was the fact the car seriously needed brakes. On the test drive I noticed very high pedal effort make the car actually stop. To stop fast was pretty well impossible. I tried to test the anti-lock brakes and couldn’t even get close to locking a wheel under braking. The bad brakes got a big chunk off the asking price.
With the Vette home I was able to check out the brake system and the ABS and found everything to be good, except the rotors had some checking that indicated they had been really hot at one time and the pads looked to be some cheap replacement type metallic pads that were glazed rather badly.
I needed to change both the rotors and pads. Looking on the Internet I found a wide range of rotors and pads for the Vette. For a mere $3.5K I could upgrade to a C5 full system with really cool red calipers with the Corvette logo on them. Unfortunately, that would be WAY OUTSIDE my budget. For the amount of money that I had to put into the brakes I would probably be purchasing stock replacement parts, which would actually be fine for my car, I wouldn’t be racing it or anything like that, it was basically going to be a cruising car. But I really wanted to get either drilled or slotted rotors for a slight upgrade in performance. (And they look cool too!)
Then I found Brake Performance. (brakeperformance.com) They have stock rotors, drilled, slotted, and drilled & Slotted rotors at what I considered really good prices. They also have calipers, wheel cylinders, master cylinders, you name it, they have all the brake parts you could want. I was able to purchase 4 slotted rotors and premium semi-metallic pads for less money than buying stock replacement parts at the local parts store.

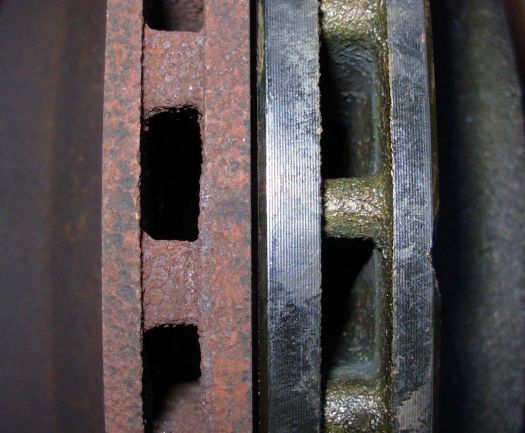
Rotors are plated and available in either black or silver. Your typical Auto Parts Store rotors are raw cast iron.

I was somewhat concerned that these were cheap Chinese castings, but they compared favorably in thickness to the OEM rotor.

The top pad came off the Vette, not sure if they were factory original. The Premium brake pads have the “silencer” plates on the back of the pad. High quality pads have these plates to reduce brake squeal by preventing the steel backing plate of the pads from rubbing against the caliper and pistons.
Well, let’s get dirty and change the brakes. I started with the rears, for no particular reason. Of course, you need to get the car on a jack or jack stand. All appropriate safety precautions should be taken. I suggest that when jacking only one corner of the car that you pop the hatch if you have a coupe, and the door on the side of the car you are jacking just to prevent stresses on these parts.
Because I was replacing both pads and rotors, I elected to take the caliper and caliber mounting bracket off as one piece. If you were replacing only the pads, you can take the two bolts off the back of the bracket that holds the caliper assembly to the bracket. Remove the two bolts that hold the caliper mounting bracket to the suspension. Lift the caliber and bracket off, and remove the old rotor.

Two major parts of the rear brakes, the caliper and the caliper mounting bracket. The rotor has been removed in the picture.
Now, remove only the outboard pad. Push it in towards the inboard pad. Once it clears the notches in the caliper mounting bracket it will fall right out. Make note of how the small anti rattle springs on the top of the pad fit against the caliper. You will want to get the new pads back in with their springs in this same position.
Remove the cap from the brake master cylinder and remove some of the fluid from the reservoir, this will prevent it from over flowing when we push back the piston in the caliper. You can use and old turkey baster or a vacuum pump with a catch bottle to get the excess fluid out of the reservoir. (If you get the turkey baster from the kitchen don’t take it back when you are done, unless you actually like a hint of brake fluid flavor with your oven roasted turkey. If questioned later, deny any knowledge of its disappearance.) When you are done, place the cap loosely back on the master cylinder to prevent the fluid from squirting out of the top and on to your car.
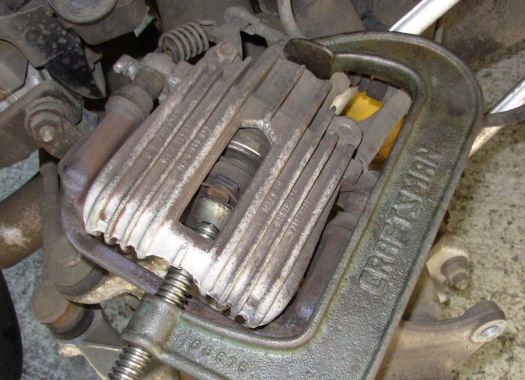
Now, put a large C clamp on the caliper as shown and SLOWLY push the piston back into the caliper. Then, remove the inboard pad.

Place a large C clamp across the caliper and slowly push back the brake piston. Leave the rear pad in place to push against without damaging the piston.
At this point everything was going fine for me. It got a bit testy when I tried to get the pads back into the caliper. The anti rattle springs are pretty stout. Add to that the fact that the “ears” on the pads fit into slots on the Caliper Mounting Bracket, not into the caliper make the process of getting the pads in more difficult. After struggling with the pads I found that I could put the pad in tilted with the top of the pad tilted toward the other pad. (See photo below) Part of the problem was that with the pads out of the caliper there was very little holding the bracket and the caliper together. If you are not careful the two parts will just fall apart. Also, on the rear you have to wrestle with the parking brake cable which is quite stiff. Getting the pads back in can try your patience.
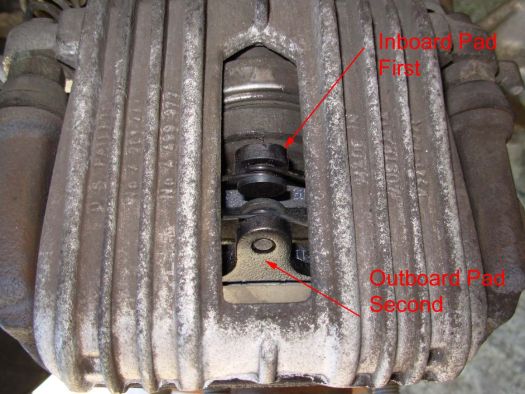
Starting with the inboard pad, tilt the top of the pad (with the anti rattle spring) toward the outside of the caliper and put it up in place, aligning the “ears” into the notches in the bracket. Then, take your fingers and push the pad back against the piston making sure the anti rattle spring is in place. Once you get it to that point the pad and it’s spring will help hold the assembly together. Do the same with the outboard pad. The picture below shows the pad inserted and ready to be pushed back into it’s final position.

Replacing the pads can get tricky. I found that tilting the pad and putting the bottom in place first worked best.
I also found that loosely mounting the caliper bracket to the suspension mount helped hold the caliper and bracket so you don’t have to fight with that parking brake cable while you install the pads.
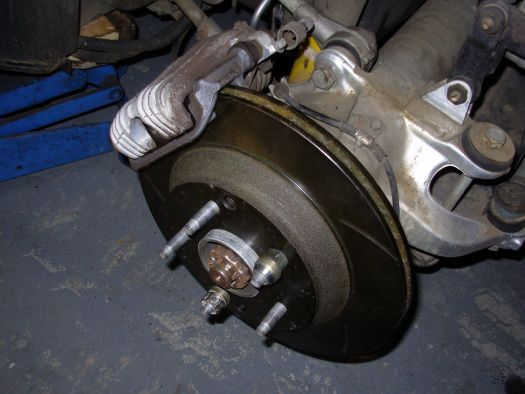
Now that is done, you can take the temporary bolts out, and put the rotor on. Use two lug nuts to hold the rotor against the axle flange and put the caliper and bracket back on. Put the mounting bolts back in and torque them to spec.

Almost done. Use two lug nuts to hold the rotor in place while you position the caliper back into place and tighten the mounting bolts.
Now, recheck everything. Put the wheel back on and torque your wheel lugs. Take the car off the jack and let’s move on to the fronts!
The fronts are a bit easier to do than the rears, but they have a slightly different setup. The front calipers are dual piston and the pads are held in place by two round spring clips. Remove the caliper bracket bolts and lift off the caliper. Then remove rotor. With a flat blade screwdriver pry out the outboard pad. Using your C clamp again, push the piston back. Watch that fluid reservoir to make sure it doesn’t overflow and ruin anything.

Position your C clamp and push the pistons back. Leaving the inboard pad in place allows you to push both pistons back at one time.
Now remove the inboard pad. Once that is done it is pretty sure the caliper and bracket will separate. There is a small pin on one end with a E clip on it. It will fall out. Make note of it’s position (see photo above) as you will have to put it back in before you put the pads in.
On the rear, the inboard and outboard pads were the same. On the front pads the inboard and outboard pads are DIFFERENT. As you take the old pads off match them up with the new pads of the same type. You may have to move the anti rattle spring from the old pad to the new pad depending on what brand of pads you purchase. In the case of the Brakeperformance.com pads, I had to move the spring. In the photo below the old pad is on the bottom. With a pair of pliers remove the anti rattle spring and reinstall it in the same position on the new pad.

Match up and lay the new pad beside the old pad then move the anti rattle spring. Note that the inboard and outboard pads are different. The small riveted clip on the right is the wear indicator. When the pads wear down the spring steel clip will contact the rotor and make a very audible squeak to alert you that it is time to change the pads.
Reassembly goes like this; Start with the inboard pad. Position the bracket and caliper together, get the take down pin in place and insert the inboard pad. Align the round clips carefully with the bores of the pistons, and press the pad firmly into the caliper/pistons. This can be a bit tricky, because to get the round clips aligned you have to push the pad in straight.
As with the rear, the pads lock into the caliper bracket, not the caliper itself. Once you have the inboard pad in place, repeat the process with the outboard pad. With pads in place, put the rotor on, holding it with a couple of lug nuts. Work the caliper and pads over the rotor and put the attachment bolts back in. In my case, I put one of the anti rattle clips on backwards. It hit the rotor and the caliper wouldn’t go back on. After a recheck I saw my error and had to disassemble the caliper again. Go slow and be careful. Reattach the caliper bracket and torque the bolts to spec.
Once you are done with replacing the pads and rotors, check the fluid level and fill or remove as necessary. Replace the cap.
All in all doing all four brakes took me about 2 hours. The second ones were pretty quick, after I figured out how to get the pads in on the rear brakes. It isn’t a hard job to do and you can save yourself some considerable money doing it your self.
After breaking in the new rotors per the instructions supplied by Brakeperformance.com my brakes are just great. They perform as they should. I am very pleased with the quality of the parts from Brakeperformance.com and especially with the price.

Just curious, hw much does calibers cost each, on a 94 vette?
Hi
Thanks for the detailed instructions.
How did you detach the parking brake cable from the rear caliper? The parking brake cable goes through a hole in the caliper bracket and I can’t figure out how to detach it.
I didn’t disconnect the parking brake cable. I didn’t need to remove it to change the pads. It looks like a job. I have disk brakes on my Trans Am and I have removed the brake cable on it. The spring is really hard to get back on. It took two of us to get the cable back on. One to hold the spring and one to get the cable hooked in.
I didn’t price the calipers, but you can at http://www.brakeperformance.com
can you help me find the rear caliper bracket mounting bolts (the fat ones that hold the whole caliper thing), 3/4 ” screws ?
i broke one while tightening it, and can just find unthreaded bolts, but no screws where only the top end it unthreaded.
There are several GM bolt suppliers on the internet. Although they specialty is typically body bolts you may find them there. Otherwise, I think you have going to have to go to a dealer or a junkyard to find those bolts.