Corvette Project
I’m getting close now on finishing the “Corvette Project.” As usual, I saved the worst for last. The interior.
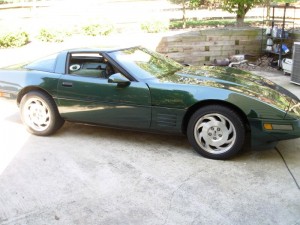
We bought the Corvette, a base model 1994 vintage coupe, in Polo Green Metallic with beige and black interior, cheap. It was cosmetically in pretty good shape. The exterior was in very good shape but the interior was in need of carpet and and a couple of the trim pieces needed a rehab or replacement. The car did not run well at all, and that allowed me to negotiate the price down. The car would barely idle, but the engine sounded solid and ran great at road speed, no funny mechanical noises that would make one think that there was a problem with the internals of the engine. While Barb distracted the saleman, I removed the oil fill cap and Peered into the valve cover, the inside of the engine was clean as could be, not a sign of any sludge. When the salesman tried to demo the car, he had a hard time getting it started and keeping it running. The brakes were just simply awful. You would expect a Corvette to have “stand it on it’s nose” brakes, but not this one. Pushing on the brake pedal as hard as you could would not lock a wheel or activate the anti-lock brakes. But, I am a pretty good mechanic and figured that I could fix those problems pretty easy.
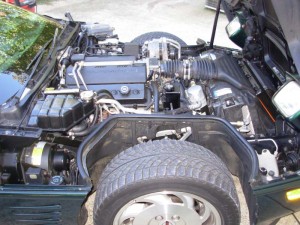
I found the problem(s) that were causing the rough idle, a bad EGR valve and a vacuum leak on the intake manifold. After I thought that I had it running pretty good I actually found another vacuum leak at the Cruise Control Servo. In addition I put new plugs in, a couple of new O2 sensors and the Vette was running seriously good at that point. Then it blew the top radiator hose and sprayed the engine down with coolant! (I had spent hours over two Saturday’s cleaning the engine compartment) Since this was a 17 year old car, I decided to go ahead and replace all the coolant hoses and complete flush the cooling system. There are an even DOZEN coolant hoses on this year Corvette! Finding and ordering parts took a week, then a couple of weekends to replace the hoses…..one of those weekends was spent pulling the radiator and cleaning it inside and out. It had what looked like a birds nest of grass and dirt in the radiator. The C4 Vets are what they call “bottom breathers,” they get the air for the cooling from up under the nose of the car. So they are prone to picking up all manner of stuff off the road. Along with leaves and dirt, I also found a Baby Ruth candy bar wrapper in the radiator!
Something I have learned about working on Corvettes is that it usually isn’t all that hard to repair or replace things on the car. It is the stuff you have to remove to get to what ever you want to replace or repair that takes the time and makes the project challenging!
So now running good, and looking good on the outside, I have started the job of the interior. I hate working on things inside the car. Having to get up under the dash is particularly difficult for several reasons. First, the designers have to be tricky and try to hide the fasteners, I guess so they don’t show and “spoil” the look of the plastic panels. Second, the designers cram so much stuff behind and under the dash. Third, I’m fat. It makes it hard to get hands, head, arms under the dash at the same time.
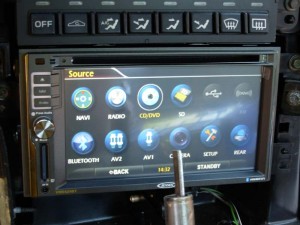
I will say there has been one improvement, accessing the radio. Barb’s ’81 TransAm is old school GM, the radio installs from behind the dash panel. (Actually, I think they started on the assembly line with the radio and built the car around it) The car had an aftermarket radio in it that looked pretty bad and didn’t work that well either. She also had the original Delco AM/FM Stereo Cassette radio which had a blown amplifier chip on the right channel. I was able to find a used AC Delco amplifier Integrated Circuit from Corvette Radios (on the Internet) and got the original radio working…..but then I had to get it in the car. That required pulling the console, most of the duct work for the heat/AC, and replacing some of the wiring that was cut in order to install aftermarket radio. The connectors for the original radio were gone, but finally found those on the Internet.
Of course, the plastic duct work and the foam seals on them disintegrated upon dis-assembly which again sent me to the Internet searching for parts. What did we do before the Internet?
The Vet is better, after taking just about the entire center console apart, you can remove the bezel that covers the radio and remove it out the front of the dash. But, again, they have to be cleaver about hiding fasteners, so you start with the center console door/armrest and work your way forward. A baggie full of screws and a bunch of trim parts later, you can get the radio out.
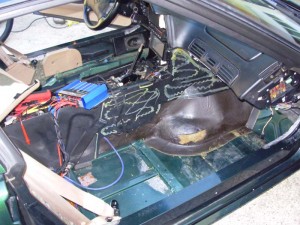
So, with the radio done, now to the carpet. Some of the carpet came out pretty easy, but working forward it got harder and harder. If you look at the pictures you will see white wavy lines on the side of the console. That is glue, really good glue. I think they used this same stuff on the Space Shuttle. Vettes are not like the typical sedan, where you remove the floor trim at the doors, the seats, and the carpet comes right out in once piece. There are about a dozen different pieces of carpet, many of them glued in place. So, there’s another complete Saturday pulling the carpet out.
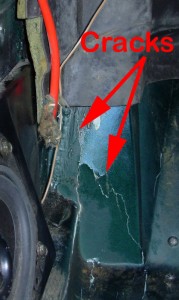
Carpet out, I start to clean up the floor boards. What’s this? Looks like a crack. Yep, it’s a crack in the floorboard to the left of the brake pedal. Now we are in for some real fun! Get a fiber glass kit and patch up the cracks and move on, right? Nope. Late in the C3 generation GM moved from true fiberglass construction in the body of Vettes to SMC, or Sheet Molded Compound. Back to the Internet for some reading and I find that there is different resin used for SMC verses fiberglass, so the widely available fiberglass repair kits really don’t work well for later Vettes. So another week goes by while I locate and order SMC resin. Every auto supply place I called told me I could use the fiberglass repair kits with epoxy resin although the suppliers of SMC said no, it is a polyester resin. Be careful of advice from the auto parts stores.
So, it’s 2:00 PM on Saturday and I am taking a break while the resin sets up on my repair. Looks good, we’ll see how it holds up.
Maybe in a couple of more Saturday’s I will have the carpet back in the car and will be able to drive it again! I can only hope!
So how did turn out? Did the polyester resin stink too bad?
You did the right thing trying to find the right resins. I’ve had luck with odd epoxy resins at marine suppliers, like West Marine, or even aviation. There’s a big airplane building crowd out there these days. Aircraft Spruce is the big supplier.
Just in case…
It came out good. I sanded down the area to get the paint off and get down to the original fiber. That opened up some holes. I put some small patch pieces of glass over the holes, then laid two layers of glass on the flat surface of the dead pedal and soaked it down good with resin. Came out good. I’m happy! I didn’t see any need to paint it since it is now covered with carpet. It was nice and stiff and sealed up.